
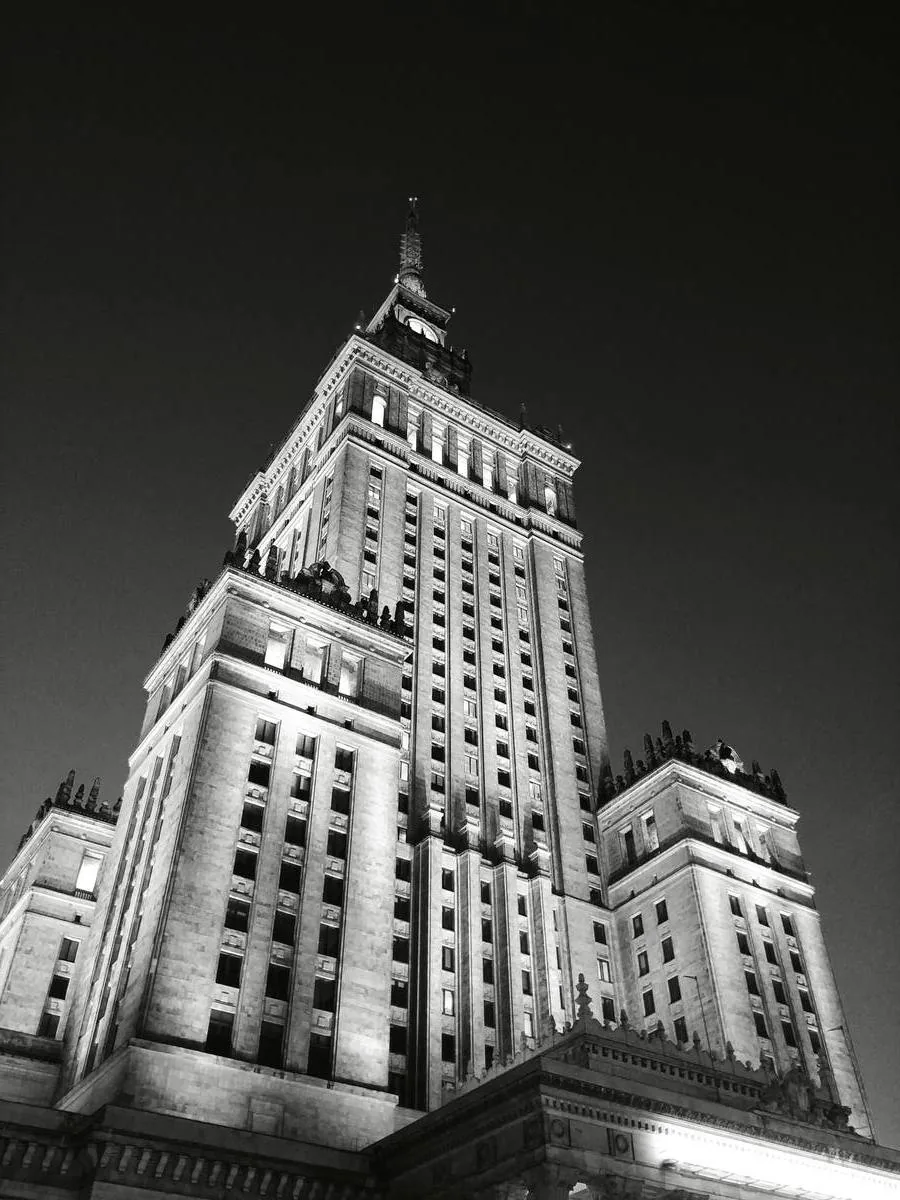
I avoided black and white photography for years. It felt like a gimmick — what you did when colors were boring or when you wanted to look artsy on Instagram. Then I spent a week in Warsaw, switched my camera to monochrome mode, and realized I'd been missing half of what photography has to offer. Here's everything I've learned about shooting in black and white, from the mindset shift to the practical techniques that make it work.
Why Shoot Black and White Photography?
Color is powerful, but it's also distracting. A mediocre sunset photo can look "nice" because the oranges and pinks carry it. Remove the color, and all that's left is the composition — the lines, the shapes, the light, the story. If those elements are weak, the photo falls apart. This is exactly why black and white photography makes you a better photographer overall: it strips away the safety net and forces you to get the fundamentals right.
When I started shooting B&W seriously in Warsaw, it rewired how I see. Suddenly I was noticing things I'd walked past a hundred times — a shadow falling across a staircase, the rhythm of windows on a brutalist facade, the way light wraps around a concrete pillar. These things were always there. I just couldn't see them through the color.
What to Look For in Black and White
Contrast
Black and white photography lives and dies by contrast — the relationship between the darkest and lightest parts of your frame. Strong contrast creates visual impact. Look for scenes where deep shadows sit next to bright highlights: a sunlit wall beside a dark alley, a white shirt against a dark background, light streaming through a window into a dim room.
Texture
Without color to distract the eye, texture becomes a primary subject. Rough concrete, weathered wood, cracked paint, wet cobblestones — these surfaces come alive in monochrome. Side-lighting (light hitting a surface at an angle) is your best friend for revealing texture, because it creates micro-shadows across the surface.
Leading Lines and Geometry
Lines, patterns, and geometric shapes are more prominent without color. Train yourself to see roads as leading lines, buildings as rectangles, staircases as repeating patterns. Warsaw's brutalist architecture was perfect for this — the Palace of Culture and Science, with its massive Stalinist geometry, looked ordinary in color but extraordinary in black and white.
Light and Shadow
In color photography, the "best" light is usually golden hour — warm, soft, flattering. In B&W, every type of light has value. Harsh midday sun creates dramatic shadows that are stunning in monochrome. Overcast days produce soft, even tones that are perfect for texture and detail. The times of day that color photographers avoid are often when B&W photography shines brightest.
Camera Settings for Black and White
Use Monochrome Preview Mode
This is the single most useful tip for learning black and white photography. Set your camera's picture profile or creative style to monochrome. On the Sony A6600, it's under Creative Style > Black & White. Your viewfinder and LCD will show the scene in B&W, which trains your eye to see tonal contrast instead of searching for colorful subjects.
The key: always shoot in RAW. Even with monochrome preview enabled, the RAW file retains all color data. You get the B&W preview for composition while keeping full flexibility in editing. If a shot turns out better in color, you haven't lost anything.
Exposure for Black and White
In monochrome, slightly underexposing often produces more dramatic results than overexposing. Dark shadows and punchy midtones create mood and depth. Watch your histogram — you want a wide spread of tones, from true black to near-white, with most of the detail in the midtones and shadows.
Best Subjects for Black and White Photography
Architecture — especially brutalist, modernist, and industrial buildings. The geometry and textures of concrete structures are made for monochrome. My week in Warsaw shooting the Soviet-era buildings convinced me that architecture might be the ideal B&W subject.
Street photography — the interaction of people, shadows, and urban environments works beautifully without color. Look for silhouettes, reflections, and human figures against graphic backgrounds.
Portraits — black and white portraits focus attention on expression, skin texture, and the play of light on the face. Remove color, and every wrinkle, every freckle, every catch-light in the eyes becomes more powerful.
Landscapes on overcast days — when the light is flat and the colors are muted, switch to B&W. Suddenly that grey, boring scene has tonal depth and atmosphere that color couldn't capture.
Editing Black and White Photos in Lightroom
Converting to B&W in Lightroom is just the starting point. The real work is in the tonal adjustments. Start with the B&W Mix panel — this controls how each color channel translates to grey. Pull the blue slider down to darken skies. Push the orange slider up to brighten skin tones. Adjust the green slider to change how foliage renders.
Then move to the tone curve. A gentle S-curve (shadows pulled down, highlights pushed up) adds contrast without crushing detail. Use the clarity slider sparingly — a touch adds grit and texture, but too much makes everything look hyper-processed. Grain can be effective in B&W too: a subtle amount adds a film-like quality that feels organic in monochrome.
Start With a One-Day Challenge
Here's how to begin: pick one day, set your camera to monochrome preview mode, and shoot only in black and white. Don't cheat by shooting color and converting later — the point is to train your eye to see without color from the moment you raise the camera. Shoot 200 frames. Review them at the end of the day on a proper screen.
You'll find that about 80% of your shots won't work — and that's the lesson. Those are the shots that were relying on color to carry them. The 20% that work? Those are the compositions with real structure, real contrast, real story. And once you can see that in B&W, you'll start seeing it in color too.