Editing drone photos is nothing like editing ground-level shots. I learned this the hard way in 2023, when my first batch of aerial images came out of the DJI Mavic Air 2 looking flat, washed out, and completely lifeless. The same RAW file that looked pale and gray in one preset suddenly came alive with warmth and detail under another. That's when I realized: the camera did half the work. Lightroom is where the magic actually happens.
Over the past three years, I've developed a workflow that turns those small-sensor drone shots into the kind of images that make people stop and look. It's not complicated, but it's methodical — and once you understand the logic, you can apply it consistently to hundreds of images without losing your mind. Here's exactly how I edit drone photos in Lightroom, from the moment I import the RAW files to the final export.
Why Drone Photos Need Special Attention
Drone sensors are small. This is the trade-off for portability — the DJI Mavic Air 2 has a 1/2-inch sensor that's better than most compact drones, but still far from a full-frame camera. Smaller sensors introduce specific challenges that you don't face with a full-frame mirrorless camera. First, they produce more noise at higher ISOs, especially in the shadows. Second, the lens has fixed parameters that can create subtle distortion and vignetting. Third, because the camera settings default to auto-everything, the color profiles come out flat and undersaturated to accommodate a wide range of lighting conditions.
Then there's the dynamic range issue. When you're shooting from 100 meters up, the sky can be brutally bright while the landscape below is darker. Your drone's metering struggles with this — it either exposes for the sky (turning the ground to mud) or exposes for the ground (blowing out the sky completely). RAW files give you the latitude to fix this in post, but you have to know where to look. Drone photos also lack the dimensional contrast that comes naturally from shooting at ground level; everything feels a bit flat until you add clarity, texture, and careful color work.
My Import and Culling Process
The first step is boring but essential: import everything into Lightroom, then be ruthless about culling. I import all the RAW files from a day of flying into a single folder, then immediately rate them using Lightroom's star system. One star means "technically acceptable but uninspiring." Two stars means "good composition, worth editing." Three stars means "exceptional — this is portfolio material."
My rule is simple: I only spend editing time on the two- and three-star images. With a day of drone flying, you might shoot 200-300 frames. Realistically, maybe 10-15% of those have compelling composition or interesting light. The rest are tests, mistakes, or redundant variations on the same angle. Culling forces you to be honest about what's actually worth your time. It also speeds up the editing workflow because you're not trying to salvage a technically perfect but compositionally dull image.
Step 1 — Correct the Lens Profile
This is where I always start. In Lightroom's Lens Corrections panel, I enable "Profile Corrections" and select the DJI Mavic Air 2 profile. If you're using a different drone, find your camera in the list. This single step removes lens distortion and vignetting — the darkening around the edges that small drone lenses naturally produce. It's invisible, but it's there, and correcting it first gives me a clean foundation for all the other adjustments.
I don't usually do anything else in the Lens Corrections tab. The profile does the heavy lifting. If you're shooting with a drone that doesn't have a profile in Lightroom's database, you can usually find third-party profiles online, or you can enable "Enable Profile Corrections" with a generic drone profile as a starting point. The goal is to remove that optical distortion before you start pushing colors and contrast around.
Step 2 — Get the Exposure Right
This is where the real editing begins. I always start with exposure, because every other slider depends on it being in the right ballpark. Drone photos often come out slightly underexposed — the sensor is trying to preserve highlights in the bright sky, which leaves everything else dark. I usually lift the overall exposure by 0.3 to 1.0 stops, depending on the shot. I'm not trying to make the image look bright; I'm trying to make it look intentional.
Next, I address the sky-to-landscape problem with the Shadows and Highlights sliders. I lift the Shadows to reveal detail in the darker landscape, but I'm careful not to go above +70 or so — too much and the image looks plasticky and artificial. Then I recover Highlights to bring back detail in the sky; I often push this to -80 or higher, especially on bright overcast days. Last, I use a Graduated Filter to balance the sky separately from the ground. I'll create a filter at the horizon, darken the sky a bit, and warm it slightly to compensate for the cool tones that come from that big blue space above.
Step 3 — White Balance and Color
Drone cameras tend to render cool tones by default. My first move is to warm the image slightly by adjusting the Temp slider — I usually shift it between +200 to +400 Kelvin. This adds a subtle warmth that makes landscapes feel more inviting and natural. Then I look at Tint; if the image leans green or magenta, I'll dial it back to neutral.
Now comes the HSL work, which is where drone editing gets interesting. I target specific colors that matter in aerial photography. For forests and fields, I'll bump the saturation of the Greens slider by 10-15 points; this makes vegetation pop without looking oversaturated. For water, I'll do the same with the Blues, sometimes even the Aquas. If there's a sunset or warm foreground, I'll add a bit of Orange and Yellow saturation. The key is moderation — these are additive moves, typically in the 5-20 point range. Anything more and the colors start looking artificial.
Step 4 — Add Clarity and Texture
This is where aerial photos start to feel crisp and dimensional. I use the Clarity slider (not the old "dehaze" — just Clarity) to add mid-tone contrast. I usually push it to +15 to +25, which enhances texture without creating halos. If the image looks hazy — common on humid days or when shooting through atmospheric moisture — I'll add Dehaze, typically between +10 and +30. But I go carefully here; too much dehaze creates a cartoon effect.
Then I use the Texture slider, which is newer and more refined. A small boost here (maybe +10 to +20) adds surface detail without the micro-contrast issues of clarity. The combination of modest Clarity and Texture makes drone landscapes feel sharp and detailed without looking over-processed.
Step 5 — Sharpening and Noise Reduction
Small sensors mean noise. I always use some noise reduction on drone photos. In Lightroom's Detail panel, I set Luminance to around 50-70; this reduces the grainy texture without destroying fine details. I'm more aggressive with Luminance than with Color (which I usually leave under 20), because luminance noise is what kills aerial photos — it makes them look soft and mushy when printed large.
For sharpening, I use a moderate Amount setting (usually +60 to +80) with a Radius of around 1.0. This sharpens edges without creating halos. The key is the Masking slider — I push it to around 30-50, which restricts sharpening to edge pixels only, protecting smooth skies and smooth water from looking noisy. This targeted approach keeps the image crisp where it matters (textures, details) while preserving the clean look of the sky.
Step 6 — Crop and Straighten
Drone horizons are critical. A tilted horizon is immediately noticeable from above, and it's one of those mistakes that kills an otherwise perfect image. In Lightroom's Crop Overlay, I use the Angle tool to straighten the horizon. This is non-negotiable for aerial work. If the horizon isn't perfect, the whole image feels off.
After straightening, I consider the composition. Sometimes a tighter crop improves the image — perhaps the edge of the frame has distracting elements, or the image feels better as a square for social media. I make these calls conservatively; I rarely crop more than 10-15% because I want to preserve the sense of scale that makes drone photography special.
Step 7 — Export Settings
I export most of my drone photos as JPEGs with these settings: Quality 85 (this is the sweet spot between file size and image quality), sRGB color space (for web and social), and no sharpening (since Lightroom has already sharpened). If I'm printing large format, I'll use TIFF export at full resolution instead. For web, 85% JPEG quality is more than enough; the image will look sharp on any screen.
File naming matters too. I use a template like "Todoroff-DronePhotography-CoastlineGreece-2026-03" so future me can find the image again and understand where and when it was shot. This sounds tedious, but when you're building a portfolio, being able to search and organize by location and date is invaluable.
Before and After — What This Workflow Actually Does
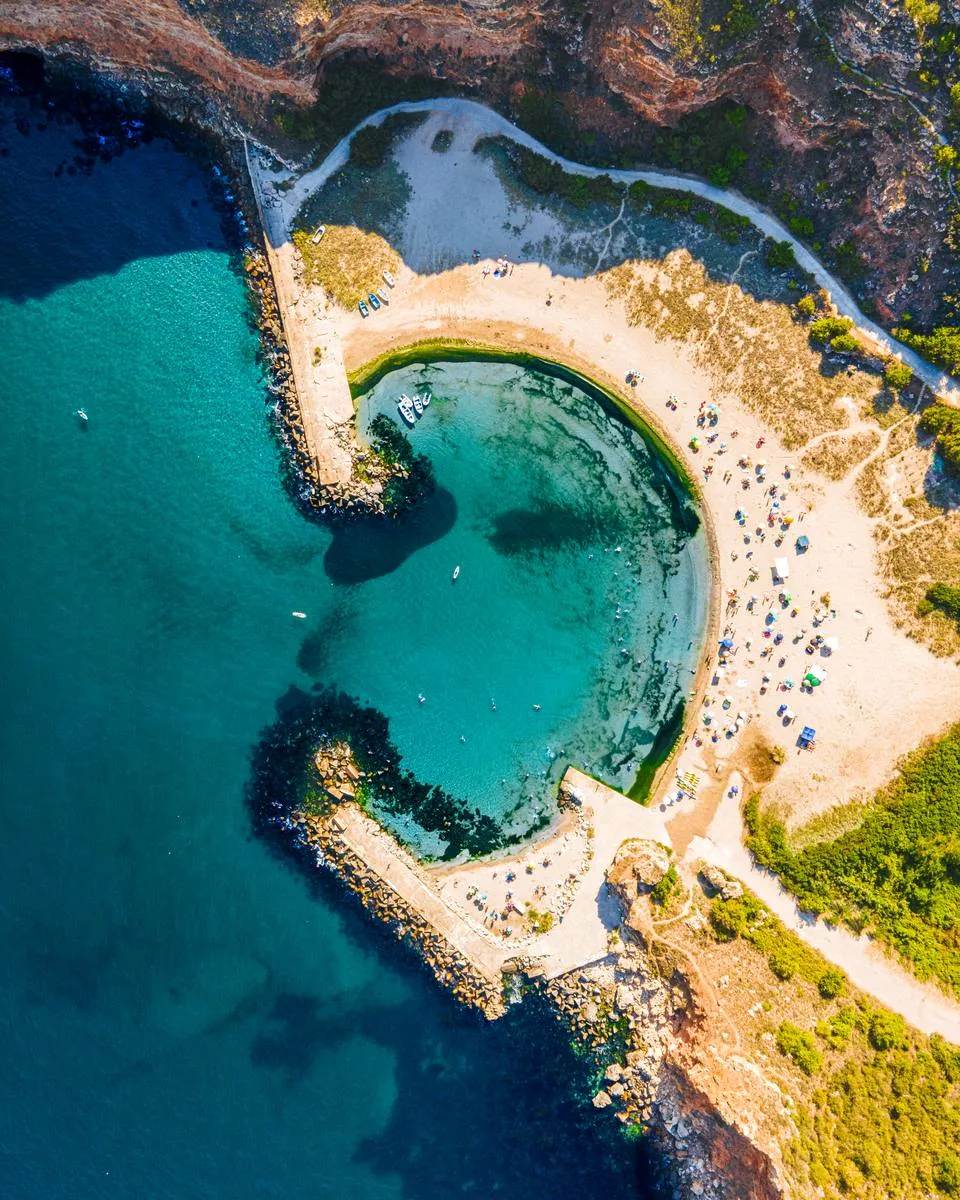
Let me walk you through a real example. A few months ago, I flew over a cove on the Greek coast — blue water, white cliffs, a sailboat for scale. The RAW file out of the camera looked dull. The sky was pale, the water was muddy blue, the cliffs had no dimension. Using this workflow: I corrected the lens profile (barely noticeable, but it fixed the slight vignetting). I lifted exposure by 0.6 stops, pulled back highlights by -70, and lifted shadows by +50. I added a graduated filter to darken and warm the sky. I shifted white balance +250 Kelvin, then boosted Blue saturation by +12 to make the water richer. I added +18 Clarity and +15 Texture. Noise reduction at Luminance 60. Sharpening at +75 with +40 Masking. The image went from looking like a screenshot to looking like a photograph — dimensional, warm, detailed, and alive.
Consistency Saves Everything
Here's the thing about having a workflow: it saves time and improves results. Once you've found settings that work for your drone and your style, you can apply a preset or use Lightroom's "Auto Tone" as a starting point, then fine-tune. Most of my drone photos follow this same sequence. The specific numbers change based on lighting and composition, but the order never does. Lens correction first, then exposure, then color, then texture, then sharpening. This consistency means that when I have 50 images to edit, I'm not reinventing the wheel on each one. I'm refining and iterating. And that's when editing becomes less work and more craft.