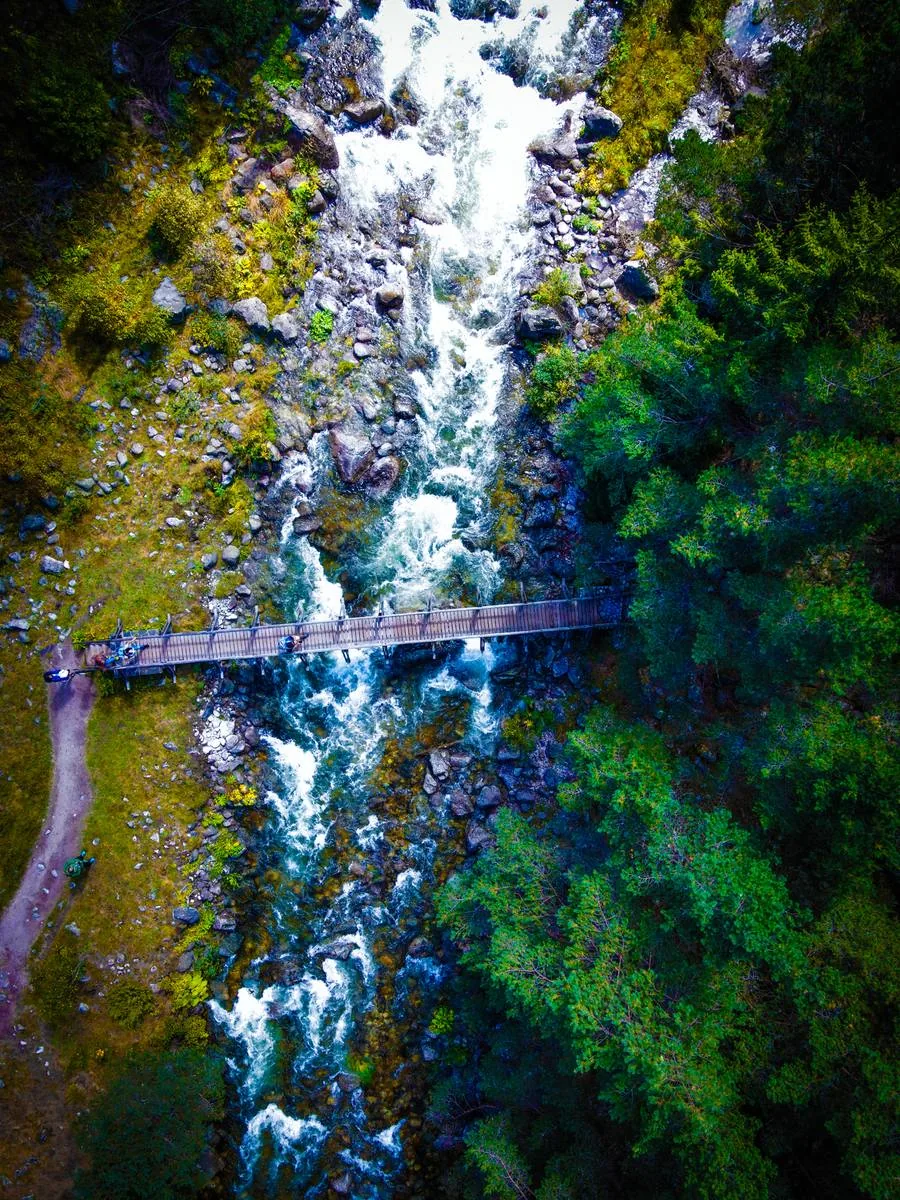
I've been shooting for over 20 years, but I only seriously tried long exposure photography about a year ago. I regret not starting sooner. What held me back was the mysterious talk of ND filters, exposure calculations, and bulb mode — it all felt unnecessarily complicated. When I finally gave it a shot on a whim near a waterfall in the Rhodope Mountains, something clicked. That silky water effect, the way movement became painterly instead of sharp — I'd been missing a whole language of photography. This guide comes from someone who recently learned it all, who remembers the confusion, and who knows exactly which questions beginners ask because I asked them too.
What Is Long Exposure Photography?
Long exposure is simple in concept: you keep your camera's shutter open long enough to capture motion as blur. That's it. The "long" part is relative — it could be a half-second, five seconds, two minutes, or longer. The key is that stationary elements stay sharp while anything moving leaves a trail.
The effects are almost magical when you see them for the first time. Water flowing over rocks becomes silky and ethereal instead of frozen mid-splash. Clouds streak across the sky like paint strokes. Car lights at night transform into rivers of color. Crowds of people become ghosts, leaving only faint traces of movement. It's the same scene you see with your eyes, but reimagined through time.
You've probably seen long exposure photos before — the dreamy waterfall images, the light trails from busy traffic, the smooth ocean swells that look more like mist than water. Those are long exposures. Once you start noticing them, they're everywhere.
The Gear You Actually Need
Let's start with what you must have: a tripod. This is non-negotiable. Long exposures only work if your camera doesn't move, and your hands, no matter how steady, will cause blur. You can spend one hundred euros on a basic tripod or a thousand on a carbon fiber marvel — both work. I use a Manfrotto travel tripod that folds small enough for a backpack and costs less than most lenses. Don't overthink it; just get something stable.
Second: ND filters. ND stands for Neutral Density — think of them as sunglasses for your camera. They reduce the amount of light hitting your sensor without changing color or contrast. Why? Because long exposures need time. In bright sunlight, you can't keep your shutter open for five seconds without overexposing the image. The ND filter solves this by darkening the scene, so you can use those longer exposures even on sunny days.
There are many strengths of ND filters, measured in "stops." An ND64 blocks six stops of light — enough for a few seconds of exposure in daylight. An ND1000 blocks ten stops — you'll get 30 seconds or more. I started with an ND64 and ND1000, which covers most situations. Some photographers buy variable ND filters, but I prefer fixed ones because they're cheaper and more consistent.
Third: a remote shutter release or a simple timer. When you press the camera button, vibration travels through the tripod and spoils the sharpness, especially at longer exposures. Use either a wireless remote, a wired cable release, or your camera's self-timer (even two seconds helps). This is cheap — a remote costs less than 20 euros.
Finally: a camera with manual mode. Any camera works — DSLR, mirrorless, even some bridge cameras. You just need full control over shutter speed, aperture, and ISO. Your phone won't cut it because most phones don't offer manual controls for the things that matter.
Understanding Shutter Speed for Long Exposure
Shutter speed is where the magic happens. The longer it stays open, the more motion blur you capture. But there's no single "right" speed — it depends on how much motion and how dramatic an effect you want.
For subtle water blur, try 1-2 seconds. This softens rushing water just enough to be dreamy without erasing the sense of flow. For the classic silky waterfall effect, go 5-15 seconds. By 30 seconds, clouds move noticeably, water becomes abstract, and anything moving at all practically disappears. Beyond 30 seconds (using bulb mode if your camera supports it), you're entering the realm of light trails, long-exposure clouds, and almost surreal motion effects.
My advice: start at 8 seconds. It's long enough to see a clear effect but not so long that you're waiting an eternity between shots. From there, adjust based on what you see on your preview. More blur? Longer. Too much? Shorter.
How to Calculate Exposure with ND Filters
This is where many beginners get stuck — but I promise it's just multiplication. Here's the process: First, take a meter reading without the ND filter to find your "normal" exposure. Say your camera meters the scene and recommends 1/125 second at f/8 with ISO 100. That's your baseline.
Now, add an ND1000 filter. An ND1000 is ten stops of light reduction. Each stop represents a doubling or halving of exposure time. Ten stops means 2^10 — or 1024 times longer. So 1/125 × 1024 = about 8 seconds.
Sounds complicated, but you don't need to do this math in your head. Apps like "ND Filter Calculator" (available free on iOS and Android) do it instantly. Plug in your original exposure and your filter strength, and it spits out the new shutter speed. I use this every time.
Alternatively, many photographers just bracket — take a shot, look at the histogram, adjust, and repeat. After a few tries, your instinct gets sharp. But starting with a calculator removes the guesswork.
Step-by-Step: Your First Long Exposure Shot
Here's the workflow I use every time, and I'd recommend you follow it exactly until you're comfortable improvising. First, find your location and set up your tripod on stable ground. No rocks, loose dirt, or anything that might shift — ideally on solid earth or stone. Frame your composition with the camera in autofocus mode. Get the shot you want in your viewfinder before you attach the filter, because most autofocus systems can't see through dark ND filters.
Once you're happy with the framing, switch to manual focus. This is crucial — your camera's autofocus will hunt frantically behind the dark filter and never lock on. Manual focus lets you lock in your focus distance and leave it alone. Some cameras have focus peaking or magnified live view, which makes manual focus easier in daylight.
Now screw on your ND filter. Take a meter reading (or use your calculator) to determine the new shutter speed. If your camera needs you to dial in a speed longer than 30 seconds, switch to Bulb mode — hold down the shutter, and it stays open. Some cameras have a "Bulb Timer" function that counts the seconds for you, which is lovely.
Set your exposure — shutter speed, aperture (usually f/8 to f/16 for landscape work), and ISO at 100. Now use your remote or timer. Press the shutter, watch the seconds count down, listen for the click, and wait. Don't touch the camera.
Once the exposure finishes, review the image on your screen. Check the histogram — you're looking for data spread across the frame without big spikes at either end. If it's too dark, increase shutter time or open the aperture. Too bright? Do the opposite. Once you nail it, take several more shots. Slight variations in light or cloud movement give you options in post.
Best Subjects for Long Exposure
Water is the obvious choice, and for good reason. Waterfalls, rivers, and flowing streams all become ethereal when blurred. Seascapes are classics too — waves compress into mist, and the texture of the ocean becomes this smooth, almost alien surface. I've spent hours photographing the rocky coastlines around Bulgaria, watching the waves smooth out like silk in my live view before I press the shutter.
City scenes at night transform with long exposure. A busy street becomes a light painting — red car taillights and white headlights draw lines across the frame, and the image captures several minutes of urban motion in a single frame. Moving people in still scenes create ghosts — they're there but transparent, as if they're haunting the image.
Clouds are underrated. On windy days, even a 10-second exposure captures cloud movement that feels cinematic. Landscapes with dramatic skies benefit from this because the sky becomes dynamic while the land stays still and anchoring.
Try combining elements: a moving river with stationary rocks, moving clouds with fixed mountains, light trails with a still building. The contrast between motion and stillness is what makes long exposure compelling.
Common Mistakes I Made (And How to Avoid Them)
I forgot to switch to manual focus before attaching the ND filter exactly once — that's all it took to learn. The camera hunted, couldn't focus, and I wasted 15 seconds of perfect light. Now I check the focus mode before every filter installation.
Light leaks are sneaky. If your ND filter doesn't seal perfectly against your lens, light creeps in around the edges. Your exposure will be uneven — bright corners, darker center. Check the filter is screwed on tight, and look at your live view before you commit to the shot.
Wind. I learned this the hard way near a river gorge. I set up my tripod, took a beautiful 20-second exposure of a waterfall, and thought it looked soft and dreamy until I got home and saw the subtle vibration from wind catching the camera. Now I always check wind speed (using the Windy app, which gives altitude-specific wind data), and if it's breezy, I'll hang a bag from the tripod center column for weight, or brace the tripod against a rock.
The last mistake: overthinking it. Not every scene benefits from long exposure. A sharp, frozen moment of a bird mid-flight or a person's expression is more powerful blurred. Learn to see when motion blur serves the image and when it destroys it. Long exposure is a tool, not a guarantee of better photos.
Ready to Begin
Long exposure photography is more accessible than it seems. You don't need expensive gear or mathematical genius — a basic tripod, an ND filter, and patience are enough. The learning curve is shallow; most people see good results on their first serious attempt. What I love about it is that it teaches you to slow down, to spend time with a scene, to watch how light and motion change over seconds instead of fractions of a second.